Wow, RootsTech was amazing! It was so great to meet everyone, hear your thoughts, and share RootsFinder with you. Thank you so much to everyone who dropped by the booth. The RootsFinder tree loved walking around for photo ops again this year, and we’re already looking forward to next year! In case you missed it, though, here’s what happened.
Using RootsFinder to untangle knots in FamilySearch
Immediately after Olivia Jewell gave her presentation, “Untangling the Knots in Your Family Tree” and mentioned RootsFinder, *dozens* of people came by the booth raving about her class. They asked to see more details about how to use RootsFinder to unpick snarls they come across in FamilySearch. Olivia is a busy mom of four and also Assistant Director at a Family History Center, so it was really great to hear how she’s had success with such problems. Since RootsFinder gives you your own private copy of your FamilySearch tree that nobody can change, and it’s free, it makes sense for Family History Center directors and Librarians to suggest this method to patrons.
Here’s what we showed them:
Option A: Start from a clean, blank tree (for complicated knots)

- Olivia recommended starting from scratch and only entering information you’re absolutely sure about to begin a clean, new tree.
- Watch for hints from RootsFinder’s partners and/or use the web clipper browser extension for Chrome or Firefox to start adding evidence. Source citations and details will get added to the timeline as evidence.
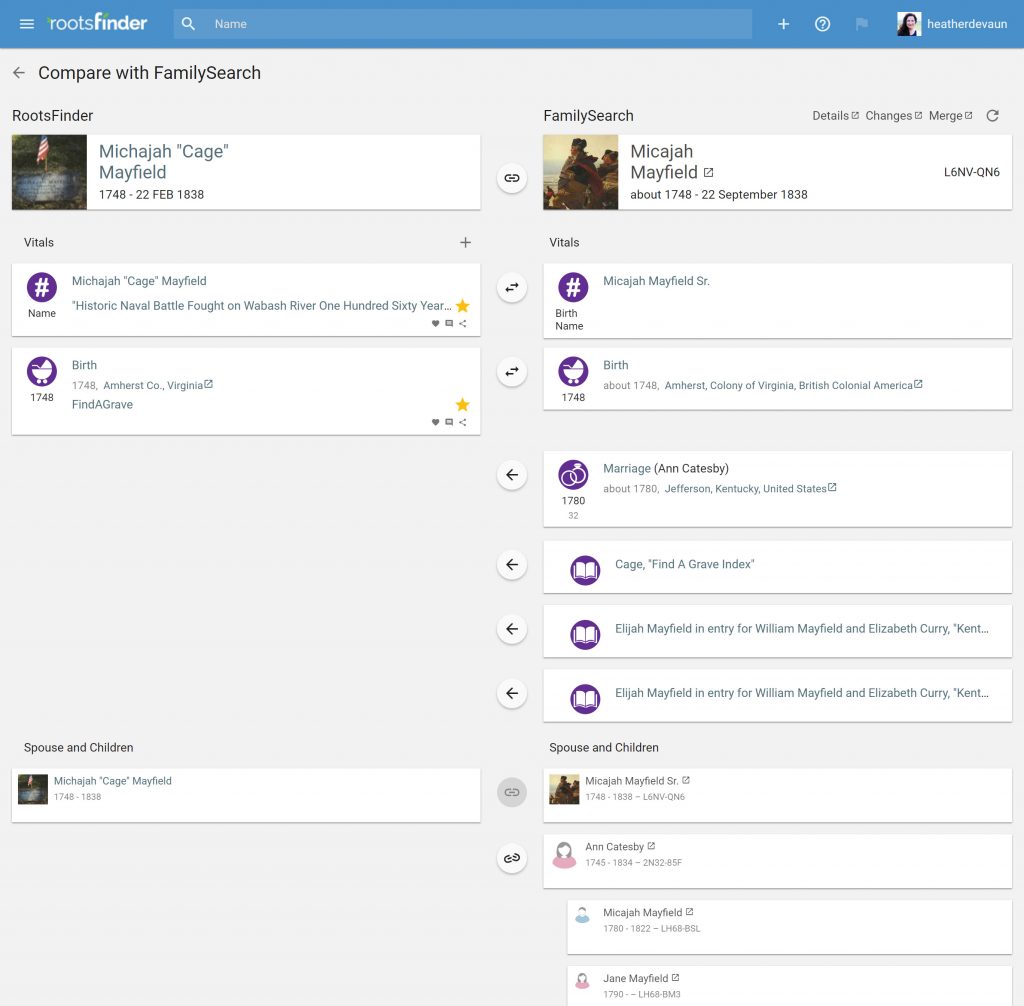
- When you’re ready, link the person to FamilySearch. Then do a side-by-side comparison of what’s on FamilySearch compared to what you’ve now researched. Use the arrow buttons to bring in any media, sources, or additional family members which support your research, but don’t import anything you disagree with.
- Once a person is matched to FamilySearch, if you’ve turned on Easy Sync for FamilySearch in your tree settings, you’ll see a semi-transparent image if there’s something at FamilySearch that’s not in your tree. Use the arrows to import these items into your tree if you want them.
 Do a side-by-side comparison with FamilySearch. Then click the arrows pointing left to bring sources, media, etc. into your RootsFinder tree if you want them. Alternatively, when you have evidence to share with FamilySearch, click the arrows pointing to the right to send it to FamilySearch. Click the link icon to add additional family members from FamilySearch to your RootsFinder tree without having to re-type everything.
Option B: Partial import from FamilySearch (for minor bumps)
- Alternatively, you can import your tree directly from FamilySearch 1-4 generations at a time. Start with the generation(s) you’re confident about. Then go carefully until you reach a problem spot. Stop importing.
- Use the merge feature to merge duplicate individuals, or unlink someone who’s been added to the wrong family.
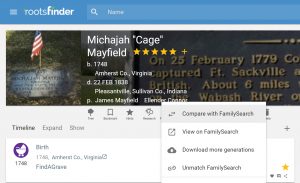
- Continue adding additional generations if/when you’re ready by clicking the FamilySearch icon, then clicking “Download more generations” when you’ve moved past the snarl.
Either way, by creating your own copy of your FamilySearch tree you’ll be able to navigate through the rough spots, gather hints, and document evidence supporting your conclusions. You may even want to start a research log to keep track of your work. With RootsFinder it’s all organized, and it’s free. And nobody will be able to change your private copy of your FamilySearch tree.
Keep us in mind for next year
We’d like to give a special thanks to our booth volunteers. We deeply appreciate the time and experiences they shared with our visitors. We’re really excited for RootsTech 2020. Please let us know if you’d like to help next year! We’ll hook you up with a free year of RootsFinder Pro Plan, a RootsTech pass and some swag, and you’ll get to meet other RootsFinder users and share stories and exchange advice.


